Modern Metal Adventure starts HERE!

6 Jun

It’s just madness, I tell you.

Everyone and their brother is starting their ISBU builds.

And that means that between emails, phones, messages and messenger, we’re getting pounded. LOL!

I’m working on a new project that may be of interest to small families or people looking to build a remote cabin  or waterfront getaway.

I was originally contacted by a Development team in Idaho who wants to build a MODERN destination resort in Colorado. Perched in the mountains overlooking lakes and wildlife, they wanted  to expand on a single ISBU cabin idea that they’d seen in Russia. They supplied us a photograph of that 40′ ISBU cabin. We don’t know anything about it’s origins and we’re doing research now to determine who designed and built this first unit. Whoever they are, they provided us with awe and inspiration! As a single ISBU cabin design, it is a wonderful thing to behold.

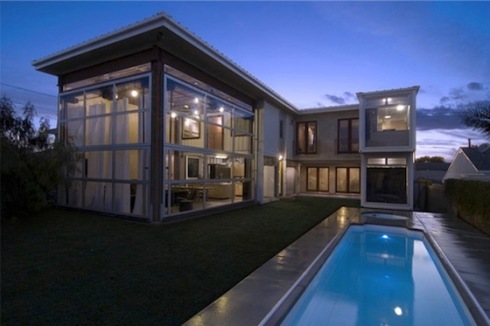
We’ve taken that idea and run with it. Add another container alongside the first and you get a really nice 16’x40′ 600+ square foot cabin. By insulating on the exterior and flooring (under the crawlspace)  using SPF, installing high efficiency windows and glazing and using SIPs (structural insulated panels) on the roof, you get a highly efficient structure capable of withstanding both high heat and low cold temperatures. BY adding a photovoltaic farm to the roof (as well as rainwater harvesting) these cabins will operate off-grid.Water is supplied via well and the septic is actually above ground, installed in a 20′ ISBU container that will handle four cabins each.

Here’s a rough render of what I think our Colorado project could look like:

We’re at the very beginning of development but here’s what I want you to consider;

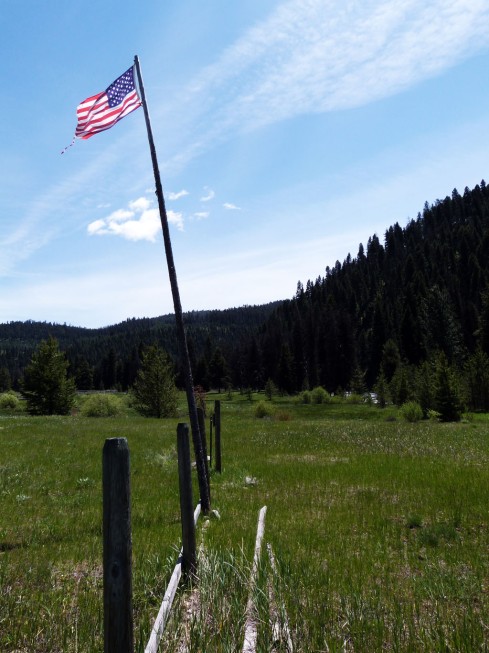
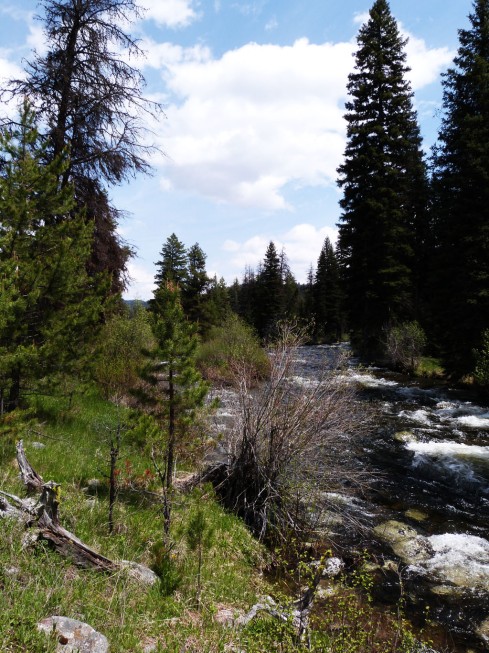
This rental cabin could also make a wonderful 2 bdrm home in the mountains or meadows of America. It would be easily accomplished and the  views could be spectacular. Surrounded by a deck system, the cabin would appear to float on the edge of the meadow. I can imagine how wonderful it’d look perched alongside a beachfront area looking out at magnificent sunsets!

Note that  these two containers are carried by three “Sonotube” type pilings and a concrete foundation in the  rear. (In this case there’s a sub-grade storage access area plus a ramp system for the disabled so concrete walls and footings are being used to carry the ISBUs so that they will form the roof of that structure.)

It should be noted that this foundation system is easily “family built”. You can “sweat equity” this  foundation without a hitch at relatively low costs.

Here’s how it’s done;

These pilings are constructed by digging a hole (usually with an auger) and then dropping round construction forms into them that look like the form depicted here.  A “bell” is usually placed on the bottom of these forms to give the piling a better base. These bases come in several shapes  and sizes and you can find them at the same construction supply store you buy your forms from. The bell shaped base snaps on the bottom of the tube (you usually apply screws to hold it into place) and then you insert the “based piling tube” into your hole.  We add rebar to the pilings to reinforce them and you should consult your structural engineer for the specs.

The containers don’t simply “rest” on top of the pilings. We also insert large J-bolts into the top of the piling so that we can add a steel plate to the top of it. This steel plate, attached to the concrete piling is the base that your ISBU will be welded to to secure it to the foundation. Concrete is poured into the piling and it fills the base at the bottom as well.  Like any concrete component, you’re better off waiting for the concrete to cure. Nobody likes to set containers on “green” (uncured)  pilings! 30 days should do it!

You could just as easily carry this entire structure using pilings and concrete pads. It’d be pretty simple. Because very little site prep is required (as you sit OVER the land and not ON it) it’s an inexpensive solution that eliminates a lot of heavy equipment costs usually associated with construction.

Normally, we’re not big fans of cantilevered containers. The reason is that they’re “harder to fly” without that support. But what you don’t see here is the steel cradle that  carries the front of the containers all the way back to those pilings and foundations. The cantilevered deck is carried by steel cables. No “hanging from thin air” here.

Sitting on the deck, you’re high enough to observe Mother Nature without having to worry about wildlife trying to eat your meals or bother your decking plants. LOL!

A lot of people ask us if we’re doing a lot with Tesla Solar Roof systems now that they’re available to the public. The simple answer is; “No.”

While we love them (and the concept of them in general) I’m still not a big fan of Tesla Solar Roofs simply due to the costs involved in building them into your project.  With Photovoltaic Panels operating at high efficiency for less than a $1 a watt, spending $8 a square foot (or more) for a beautiful Tesla Solar Roof is simply beyond the reach of most building families.

Forbes Magazine recently published this:

The average home in the United States is 2,467 square feet. According to Tesla’s handy solar calculator, the new system will set an average homeowner back $51,200 for a 70% solar roof. The company also recommends purchasing the additional, but optional, Powerwall battery to store all that new energy at $7,000, bringing the grand total of installation to $58,200.

 The percentage of solar paneling is an important metric when deciding if you really want to buy the system. It all depends on a homeowner’s energy needs, if the roof is partly shaded or sunny and how much he or she already spends on electricity each month. When all these things are considered, the ratio of solar paneling and non-solar paneling can greatly vary, as well as the price. For example, if the typical American home only purchases 40% solar tiles the price drops to $36,700, plus the $7,000 battery, totaling $43,700. And that 40% may be all you need. As Tesla noted on its site, “If you choose to increase the portion of your roof covered with solar tiles, your home may generate more electricity than it needs. In this case, you may not realize the full value of energy your Solar Roof produces.”

To help combat the sticker shock, Tesla also noted the tax credits associated with buying solar. For the 70% solar roof, homeowners may be looking at a tax credit of $15,900, while a 40% solar home can expect a $10,000 credit. The company also explained that over 30 years, a 70% solar roof will generate $73,500, meaning a homeowner could net profit $31,200 over 30 years.

But still, the price is a tremendous leap from traditional roofing. According to the calculator provided by Roofing Calculator, to completely replace the average home’s roof with traditional shingles will only set owners back between $9,000- $14,000.

Another added cost is a home’s tax estimates. As senior technology editor at Ars Technica Lee Hutchinson shared on Twitter TWTR -3.62%, “My 2600sqft **HOUSE** only cost $200k. My property taxes would explode w/adding another 50% onto the home’s appraised value.”

Musk immediately, and honestly replied, “This is true. The economics are not yet compelling where housing and utility costs are low and property taxes are high.”

Would I put that really expensive Tesla Solar Roof on my own home in the mountains of Montana? Yes. I’d probably consider it. Combined with the Powerwall battery storage system, I think it’s an incredible solution to explore and before I’d use it on your home, I’d really like to live with it on mine to insure it works without a flaw. Now, also consider that my home includes a design studio and a music studio, so I will be able  to justify the expense of all that power production. I won’t waste any of it with “too many tiles and not enough demand”.

WILL I include it in my own building budget?

It will depend on final pricing and installation costs. I suspect that in all honesty, I’ll probably wait for the second generation of the roof tiles and Powerwall units and that commensurate price drop that will come as production costs begin to decrease. I will have several other structures on the property (including guest houses) that require power and we’ll more than likely select one or more of those structures to experiment with.

Stay tuned to learn more about this project. If current responses are any indicator, it’s going to inspire a lot of cabin and remote builds in the future.

Every Tree Needs Roots!

23 May

As we venture into Spring (we still haven’t gotten our 15 seconds of Spring in Montana yet…) LOL!

We’re getting questions from readers about “process”. Everyone is eager to start their building adventures, paving their roads toward their ISBU (Shipping Container Home) dreams and we couldn’t be more pleased and inspired.

Many families are beginning their paths by talking to local experts, trying to gauge the places they’ll put their trust, their dreams and their futures.

We received this email recently and thought it was relevant enough to share it with the rest of you. Building projects begin as hopes, dreams and aspirations. The holder of that dream then gifts it to someone else who will become responsible for turning that dream into a reality.

But along the way, that custodian of your creation will call on others to assist him/her in order to insure that your dream becomes a reality.

Let’s just jump in, shall we?

“Dear Alex,

Q. I just left an interview/consult session with a local Architect. When we were discussing fees, he included fees for several other engineers, including a structural engineer. WTH? If an Architect goes to school to learn to design a building or residence, why then does he/she even need a structural engineer?

Isn’t that the point of Architecture School in the first place?”
The short answer is this:

Successful Architectural projects are collaborations. The architect designs the building. The engineering team ensures the building meets local building codes and that it is physically possible to build. Most engineers have no idea whatsoever or little experience on how to maximize light exposure for certain facilities, including both natural and artificial light, but an architect does. Most engineers have little to no idea how play with materials and textures to maximize comfort, but an architect does. Most architects have little to no idea how to even measure a complex structure response to most accidental load scenarios like earthquakes, tornadoes, hurricanes, flooding etc. But an engineer does. Most architects have little to no idea how to design infrastructure projects such as dams, bridges, highways, railroads, etc. But an engineer does.

Think of it like this:

An architect is like a big, beautiful tree…  and that engineering team is a vital part of it’s trunk and root system.

This engineering support system gives life to the tree. The input of the engineers provides the strength to the tree and makes it possible for that tree to live (and even bear fruit) for a long, long time.

Architects don’t know “everything” about construction.

Some like to think they do but the reality is actually much different.

Now, don’t get me wrong. Architects know a LOT, but an architect is still just a “generalist”. An architect actually needs all sorts of engineers to create and complete a project successfully.

In a nutshell, the architect is the conductor and the engineers (and other specialists) are the musicians. They have to work together to complete a project. It’s a orchestra of skills.

It is up to the conductor (architect) to take overall responsibility and coordinate the overall intention of the project. The conductor has to have some basic knowledge of the musicians’ (engineers) instruments. However, the overall success depends on the skill and experience of the individual musicians (engineers). You can’t do one without the other.

The architect creates, orchestrates and oversees the building project design and usually provides oversight during construction. However, the engineers are specialists and they play their parts in the orchestra by being tasked with the design and oversight of their specific trades and project aspects only:

  • The architect plans, organizes (orchestrates) and gives form and space to the building project.
  • The architect develops a design that finds solutions and fulfills the client’s requirements.
  • The architect presents this information to the planning boards, review committees and building authorities.
  • The architect obtains planning approvals, obtains permits and other required documents required for the construction of the project.
  • The architect is also responsible for special (particularly safety) aspects such as building code classifications, fire separations, exits, emergency exits, emergency systems, and egress stairs as well as insuring that all accessibility requirements are met.

In addition to this, the architect usually provides the “Architectural Artistry” the project brings to the community – this because the determination of whether it is a work of art or not depends on how it will later be judged by the clients and the public at large. You can bet that this judgement will be based in a large part on the actual design of the project.

As the design leader, the architect usually conceptualizes the structural, mechanical, electrical and plumbing systems – and coordinates all of it. Again, he/she is the conductor.

However, the architect relies on the various specialist engineers to assess and assist, to finalize and take responsibility with calculations, detailing and oversight. The “musicians”.

For most buildings constructed in most places, only qualified engineers can provide these specialized engineering services. The architect is – by law in most places – required by virtue of their generalist training and certification and is licensed to “practice architecture” and NOT engineering.

Structural engineers don’t go to traditional architectural schools or classes. They are required to study Civil Engineering courses designed to build the required skills allowing them to resolve structural and other engineering aspects of a project. Because of this education, they are licensed to ‘practice structural engineering’, and not architecture.

You don’t need an architect to design “everything”. Certain buildings that are not intended primarily for human occupancy may not be required to be designed by an architect.

In those cases, a civil engineer usually takes the lead role – as in the case of the construction of bridges and roads.

Also, building projects such as small square footage houses often don’t need any professionals at the design level to be involved. These projects are often designed by technical / design drafting services or even design/build contractors.

While your architect will bring your dream to life, those engineers involved are vital to it’s creation. Put simply, engineers have to come up with solutions to complex problems and implement them; they literally shape the world that we live in.

For those of you out there considering a trade path, there are many different specialties within civil engineering. These include environmental, structural, electrical, municipal, transportation and geotechnical engineering services. Civil engineers design, build, supervise, operate, and maintain construction projects and systems in both the public and private sector. These projects include roads, buildings, airports, tunnels, dams, bridges, and systems for water supply and sewage treatment.

If you really want to push the envelope, look for a University that has an Architectural Engineering program.  If you do this, send us your shipping address and we’ll start sending you as many Tylenol tablets as you can eat. You’re going to need them! This challenging path insures many, many long nights of bookwork and studying!  LOL!

Basking in the glow of Builder’s Hell!

21 Sep

We’ve all seen the photographs.

_THB7839JPG

You can past any shipping port in the United States and you’re going to bear witness to evidence that somethings wrong in America. You see, as you drive past ports like Long Beach, you are bound to see mountains made of steel. I’m not talking about skyscrapers. I’m talking about row after row of empty shipping containers stacked up to the sky like a child’s Legos,  colorful building blocks piled on top of each other until they almost kiss the clouds.

We know why this  is happening. It’s a testament to the failure of American Manufacturing… the lack of export commerce. Yes, I said that out loud. It’s a reminder that today’s economy is suffering and it’s not getting any better, despite what you read on the internet.  In the global arena of manufacturing of goods, we don’t compete. We simply import more goods than we produce.  American households are filled with possessions and a lot of them come from “someplace else”. Think about that for a minute.

This also means that we don’t export products to other countries to support a growing America competitively. Due to America’s trade imbalance with foreign countries, countries like China, over half of the shipping containers that enter our ports never make it back to their points of origin. It’s just not cost effective to return empty containers to China to refill them. It’s cheaper and more efficient to build new ones to ship that Chinese TV over so you can buy it at Walmart.

And, these monuments to our manufacturing failure have to get piled up someplace, right?

It’s because of these metal mountains that more than a few creative minds have started to think outside the box. I mean, we’re stuck in traffic, staring up at them.

You know where this post is going…

Over the last few years, many outspoken architects and engineers have addressed the use of shipping containers as structure. Readers of this blog know that we are heavily involved in taking these cast-off steel boxes and turning them into incredible, sustainable, affordable homes for families across America and beyond it’s shores.

Recently, I’ve witnessed yet another resurgence of naysayers from the trades who claim that building with containers is a boondoggle. They claim it’s a “budget busting peril” to be avoided at all costs… especially when cost is a determining factor. They say that building with containers is anything but affordable.

Yeah? Bull.

Let me tell you WHY these “tradesmen” are so outspoken. We live in difficult times for housing. Money for building is getting harder to get. Many building firms are going out of business due to the lack of projects. Fewer families are entering the housing market. They’ve simply been forced out of them as the economy squeezes their paychecks harder and harder each year. It’s because more and more Americans are learning that there are other paths to take… paths that lead away from tradesmen stuck in “doing traditional things in traditional ways.”

Your decisions to look beyond the “run of the mill” aren’t “normal”. They don’t want you to save money. They get paid a percentage of what you spend. They don’t want to be forced to learn new skills. That costs them even MORE money. Your decisions about housing are affecting their bottom line.  They’re scared…

What scares them the most is that people are listening to people like us…

(And we have the hate mail to prove it.)

Many of our building families offset budget expenses by using “sweat equity”. That’s right. They do it themselves. By enlisting friends and relatives in the trades, they reduce their construction costs by reducing their labor costs. Of course they have to factor in expenses like beer and burgers… but it’s a trade-off they’re willing to make to insure that they build the house of their dreams affordably.

Some of these building families break the $100 a square foot threshold on a regular basis. Even in 2016, It’s possible to build a 1,200 square foot 3 bedroom/2 bath home for $70 a square foot. I know that this is true because we’re witnessing it in locations that stretch from the Pacific Ocean to the Atlantic, inclusive of the Gulf Coast of America.

Case in point:

I want to take a moment to remind you that some of the most famous homes in Shipping Container (ISBU  – Intermodal Steel Building Unit) history were built for under the $150 a square foot threshold that most of these naysayers claim is the “starting point”.

Indisputably, the most visible Shipping Container home in America is the work of Peter DeMaria in Southern California. Now, we admit (even openly) that we think that Peter is a genius. He’s a visionary who decided that he didn’t care where his hairline moved as he played “David” to LA’s “Goliath”. We don’t agree with every step he takes but he designed and built a Container Home amidst the hostilities of some of the toughest building codes in America.  Peter and the Pirkls (the building family) captured what many think is “lighting in a bottle”.

demaria-redondo-beach-container-house-exterior-front

In Peter DeMaria’s hybrid 2 story design for the Redondo Beach House, conventional stick-frame construction was combined with eight repurposed steel shipping containers to form this wonderful “Corten Castle”. This isn’t your “run of the mill” typical tract house, either. The contemporary house sports four bedrooms, three-and-a-half baths nestled beneath soaring 20-foot-high living room ceilings and it was outfitted with glass-panel airplane hangar doors that actually disappear by folding out to create a seamless indoor-outdoor living space. To accentuate the industrial looks of the containers, the Pirkls left the corrugated steel walls exposed or enhanced with siding to replace the sturdy maritime wood floors that come standard in cargo boxes.

demaria-redondo-beach-container-house-rear-view

If you’re  a regular reader, you can see where we differ with Peter, but still… the results were amazing. There are many paths to Corten Heaven… Peter journeyed along his passionately and it shows.

This home wasn’t a “slapped together shell made of recycled/junk steel”. They included all the bells and whistles. The home was designed and constructed to provide long-term energy savings. They employed carefully selected low-flow plumbing fixtures. They embraced LED lights and Energy Star appliances. Stick-frame walls were insulated with a material called “UltraTouch” manufactured using recycled denim material. Using simple passive solar techniques they oriented the home to catch the prevailing Pacific Coast breezes so that the residence remains cool and comfortable year-round.

Did this incredible feat of Shipping Container engineering cost a proverbial arm and a leg?

No.

Did it cost the typical $250 a square foot (or more) that most of our naysayers project this home’s constructions cost demanded?

No.

Is the construction of a home like this cost prohibitive for middle class families across America?

No.

According to the guy paying the bills, home-owner Sven Pirkl:

“Once all the bills were tallied, using steel containers for more than half of the Redondo Beach House’s 3,500 square feet equaled big savings.”

Let’s read that again, shall we?

“Once all the bills were tallied, using steel containers for more than half of the Redondo Beach House’s 3,500 square feet equaled big savings.”

Remember that they built their home on Los Angeles County, Ca. Remember that when they built this home in 2006, the average cost of construction for a typical (middle class) semi-custom single family dwelling ran an average of $250 a square foot or more. The median price of single family homes in Los Angeles CA in 2016 is $477,000.00. The average SIZE of these homes runs in the $412 per square foot range.

Take into consideration that this cost represents a home that is much smaller than the Shipping Container Home built by the Pirkls.

In order to afford to purchase the median-priced home in Los Angeles, you’d need to earn $96,513 a year, according to HSH.com, a mortgage information website.

But consider that the median income in Los Angeles is about half that: $49,497, according to census numbers from 2009-2013.

So it’s no surprise that Los Angeles has been rated as the most hostile, most unaffordable city to rent in America by Harvard and UCLA.

So think about this for a minute… in the worst possible place at almost the worst possible time…

A time when the average price of building a custom home in their area was upwards of $250 a square foot, the shipping container housing project cost roughly $135 a square foot to build. Best of all, says Sven Pirkl:

“We’ve been living in the house for five years, and we’re still very happy.”

Years after that, the energy savings and the performance of the home have more than met the families expectations.

Even with the adjustments to cost projections that would be factored in over the last 10 years, the Pirkl house doesn’t begin to touch the median selling price of new construction in LA.

And remember, this is Los Angeles CA, a land where “you must make $33 an hour (over $68,400 a year) to be able to afford an (average) apartment at all.”  – Matt Schwartz, president and chief executive of the California Housing Partnership, which advocates for affordable housing.

The average RENT of a typical apartment in Los Angeles exceeds $1,700 a month. The average Los Angeles resident spends over 47% of his/her income on rent… or they drive into work from another county.

So the next time you talk about Shipping Container dreams with your friends and relatives, remember that you can show them a photo of the most photographed Shipping Container Home in American History and proudly exclaim;

“Totally cool! Totally Huge! Totally famous! 3,500 square feet as good as it gets! They built it for $130.00 a square foot in the middle of “Building Hell”! Shut up!”

It’s okay to dream. It’s even better to be able to do it when you have the facts to back it up! LOL!

— end of transmission —

Save

Taylor’s Tale… and it’s all BULL!

18 Sep

Here at “RenaissanceRonin” a while back ( a few years ago, in fact) , we started highlighting people who lived inspiring lives.

“The Life and Times…” isn’t just about steel and stone structures. It’s also about the families, made of steel and stone, that built this great nation. It’s about preserving that and our heritage as we look to our family’s safety and future.

These people remind us that we’re bigger than the sum of our parts. Their lives are literally lived “bigger than their bodies”. Their hearts, their deeds remind us that life is meant for living. They live their lives, pushing their boundaries, in a self-imposed journey of discovery. They know that life isn’t about arriving at the destination, it’s about the journey and what happens along the way.

While I was contemplating the design of a new “Corten Cordwood Bunker” for my young son Joshua on a ranch project that we are developing (inspired by a cool cabin we saw a pair of photographs of)…

log-dawg1

log-dawg2

If you thought this was a “hunting blind”… you’d be wrong. LOL! Joshua wants a bunker to play MINECRAFT in. I’m guessing the sound levels emerging from this box as he gets blown up by Creepers and Withers would frighten away even the boldest of “God’s Creatures”.

WARNING: While safe for “workplace review”…  the following content and images included in this post may make it unsuitable for small children.

I thought about the people who are curious about my personal path. People often ask me why I moved to (gasp!) Montana. It’s lost on some folks. They imagine places like Montana and all they see in their heads is a barren wasteland devoid of fast food, sub-divisions and shopping centers. They can’t imagine living in a place where they suck the sidewalks in after dark. They can’t imagine a place where they are forced to survive without 24/7 entertainment spots to keep them occupied…

I mean, most of the people making the inquiries live in “civilized places” like SoCal and NY.

Here in Montana, a life lived includes understanding life itself. We’re sustainable, self-reliant and self-responsible. We understand “the dance”… that life is lived in a balance that sometimes seems precarious. We understand that there is no river of “milk and honey” except in the fairy tales we tell our children before bedtime. We understand conservation and stewardship. We understand commitment and hard work. We understand that success at any level means that you “never give up”. We understand that you eat what you kill… or you use a camera.

Or else… You do not waste the gifts that the “Big Guy Upstairs” has given you…

I’m very fortunate that I can live in a place that is still relatively unspoiled and wild. Sure, we still have Hybrid Prius and “Hillary” bumper sticker sightings from time to time, but our days are usually filled with the glory of Mother Nature surrounded by those of our kind who love where we live despite the challenges it brings.

By the way… we HAVE 24/7 entertainment venues. It’s called “the mountains and the rivers”. You don’t stand in line waiting your turn, you don’t have to buy tickets far in advance. All you have  to do is put fuel in your 4 wheeler or saddle up a horse.

You see… living in Montana has taught me many things. We don’t languish on the sofa. We live our lives in the outdoors. We don’t drive exotic cars. Our trucks and horses are our transportation to the places where we hunt, we fish and we work in one of the most beautiful and challenging environments in the United States. We’re tool users. We set an example for our children and our kids aren’t like “other” kids.

Our kids are raised to live, learn and love in a land that is beautiful, wild and free.

It’s not just “me”, either. We’re surrounded by friends and neighbors who harbor the same love for this land.

Take 19 year old Taylor. I mean, don’t really “take” her, as we kinda want to keep her.

taylor

She looks like any other college girl in America, right? You can picture her headed off to the mall to do some serious shopping, I bet.

Um… Sure, she may enjoy the pursuit of that perfect dress or that incredible pair of jeans…

And when she’s doing that, the drive to those urban areas that support such activities allows you sights like this;

2016-03-06-16-58-07And that’s when Taylor goes into “I’m from Montana, dammit…” mode.

This weekend Taylor and her dad Sean headed out to see what bow season would bring. Apparently, they went to Elk Heaven.

taylors-bull2

taylors-bullTaylor says:

“After hard work, dedication and determination I finally got my first Bull Elk with my bow. I hit him straight through the lungs as my arrow passed through him without hitting any ribs. Ran about 50 yards and dropped, very satisfied with my first kill being so humane!”

As you can see… Taylor isn’t a “camp follower”. Taylor is an Alpha Predator. Taylor is the kind of young lady this nation was founded by. Her actions, her spirit define America and what we stand for. We take the bull, by the horns… antlers.

taylors-bull3Taylor got her bull. She got an incredible bull.

PS. Her dad, a pretty accomplished hunter in his own right… didn’t. LOL!

It’s girls like this that remind us just how lucky we are to live here in the land of the free and the home of the brave.

It’s young  ladies like this that remind us that there are still parents among us who understand “the nature of nature” and they live it to the fullest, as they prepare their children for life’s journeys. And while they do that, they feast on Elk.

We’re very proud of you, Taylor! You’re inspiring!

(And before some of you get all “You @&#^$%!! You killed Bambi!”… unless you’re  eating tofu and salad greens, you realize that the Big Guy put animals here for us to eat. Living life also includes death and the honoring of those animals that nourish our families. Life is about honoring and respecting the balance of life. Get over it.)

— end of transmission —

Wandering with “Weathering Steel”…

31 Aug

Recently, one of our readers sent us several photographs of a “tiny house” constructed from a single 20ft ISBU.

The boatbuilder owner used his yacht skills to design and build a really nice little house that could be shipped anywhere in the world.

(This can happen because he didn’t cut any exterior doors or windows into the existing shell.)

We were particularly pleased to see the innovative kitchen he laid out in that small home. Frankly, it rivals many of the small kitchens that you or I may encounter in our day to day lives. He used a full sized refrigerator. The space behind it houses his water tank. He didn’t waste an inch. Good lad!

Take a look;

ISBU Bunkhouse - Corten Cabin3

His “corner kitchen” even incorporates a washer/dryer unit. We use similar LG washer/dryers in many of our off-grid cabins in remote areas.

His container isn’t “conventional” as one entire wall surface opens up to expose the inner shell. You can find these boxes from time to time and he’s taken full advantage of the space that it provides. On nice days, he can literally open up one entire wall section to the outdoors. Talk about bringing the outside in!

And because he can ship his little Corten home anywhere in the world, that “outside view” can change whenever he wants!

Guys like this are literally rethinking housing.

As we looked at his little gem, I was reminded of another kind of “traveling ISBU Home” concept we’d seen lately. Many of our readers know that we’ve spent years working on “disaster relief housing” and the establishment of rapidly deployed shelter systems for victims and volunteers after natural disasters strike globally.

The use of ISBUs as a shelter component means that you can “rack and stack” them together to form housing units very quickly. We’ve stacked as many as a hundred units together in less than 24 hours. Read that again slowly. LESS than 24 hours. These temporary constructs can house workers, clinics, first responders and more.

But what if you could just take your home with you wherever your future  led you?

Jeff Wilson, an environmental science professor at the Huston-Tillotson University, had a similar dream. It’s called “Kasita” and it’s basically a little 20′ High Cube ISBU based apartment that actually fits into a steel exoskeleton. By “racking” these apartment units, they can be removed and shipped to other locations with similar exoskeletons.

ISBUs in exoskeleton

Small extension modules are added to the ISBU to expand it’s livability. In fact, those add-ons increase the size of the little apartment by 30%.

ISBUs in exoskeleton4

Inside, you have room for a full kitchen and even a washer/dryer. The bathroom is “normal” as well. No microscopic toilet or shower to force yourself in and out of.

ISBUs in exoskeleton5
The whole idea of a “transportable condo” sounds complicated, but it isn’t. While you wouldn’t be able to ship the little apartments overseas (because you’ve modified the shell) the small ISBUs are easily trucked from site to site. The small exoskeleton footprints allow these units to be “racked and stacked” 3 or 4 levels high without much difficulty.

If you get transferred to another city, you simply call the mover and have him disconnect and remove your unit.

You don’t pack, you don’t box up your gear. You simply take the entire residence and it’s contents with you. When you get to your new location, your unit is racked in an empty space in an exoskeleton and you’re back in business.

ISBUs in exoskeleton2
The fact that the exoskeletons that house the units take up such a small footprint (as little as 1,000 sq ft) means that they can be constructed as in-fill in almost any urban city that you can imagine. These steel racks could bolt together in the configuration that benefits the lot and observe the local building codes.

You could even build a small village of these units in previously unbuildable lots and locations. You could revitalize neighborhoods. You could build them along greenbelts.

Are you listening, Detroit?

Now add a power system like a TESLA Powerpack to this little condo and you have a unit that’s even capable of going off-grid.

Despite a long list of smart-tech and energy saving features, the size of the condo and it’s ability to be placed on small lots that no-one wants makes this a very embraceable idea in many metropolitan areas. And it solves one of biggest dilemmas for employers;

“Where will my workers live?”

Companies could even embrace these versatile condos as “corporate housing” for their workers.

Think about this for a moment;

NO Roomates

NO searching Craigslist for a rental

NO calling friends and relatives in those cities to crash on their couch while you hunt down that elusive new apartment.

NO hunting through boxes to find your packed goods.

The only thing that changes is your street address.

Imagine how workers in places like NYC or San Francisco would embrace these.

ISBUs in exoskeleton3
It’s the idea of transportable housing taken to the next level. It will allow us to house friend and families in a whole new way.

We can’t wait.

Roaring Lion, Montana – Forest Fire update

1 Aug

Okay,

Life is hectic when you’re having fun, right?

We’re jumping around all over God’s Creation like crazy people. It’s the trials and tribulations of ISBU madness! LOL!

SO after regrouping…

We’re getting set to jump back out again to the East Coast late Saturday. A client aircraft stuck in London gained us an extra night in our own beds as we work out delays in aircraft transitions. While we need to get to NY, we’re grateful for the sleep.

We do what everyone does in “stand-by mode” on Sunday morning. We take care of clients, email and surf the internet. About lunchtime on Sunday as I’m helping my son build a Lego menagerie, Sheri runs into the living room and tells me that the Hamilton, MT area is on fire, and it’s bad. After a long, hot, dry spell, I immediately wonder just how bad it is.

Moments later, I realize just how bad it really is. This photograph, taken moments before, arrives in my email. The fire is located in the mountains behind Hamilton, in a remote area of a canyon that we used to live in. It’s rugged, beautiful and heavily forested. And, it’s on fire.

Roaring Lion - 2016_07_31
This is distressing because (a) it’s a FOREST FIRE, and (b) we have many friends and my child (and his mother) living in the path of the fire.

While we immediately start to reach out to friends and family to determine who needs help evacuating and to explore the information available to determine how severe the circumstances are, we walk outside our home and realize that you can actually SEE the flames on the ridges burning in the distance.

It should be noted that I don’t currently live in Hamilton, I live 20 miles to the north in a small farming/ranching community. By observation, the firestorm is 200 feet high, fueled by thousands of beetlekill pine trees that explode like Roman Candles when set ablaze. At this point, the fire line is already over a mile long and racing DOWN the mountain toward the highway.

Roaring Lion Fire
An hour later, we get a call from friends who still live in the Roaring Lion canyons that we originally evacuated a few years back due to forest fires. Some of my readers will remember that I’m talking about an incident where at 1AM we were contacted by Sheriff’s Deputies who arrived to wake us up and help get our most important valuables into trucks so that we could get escorted out of the canyon, the fire raging right behind us.

Luckily, we had a small home in town to run to. Many families were not as fortunate as we were.

Yesterday, a wildfire started near the Roaring Lion trailhead that almost immediately turned the surrounding forest into a fire tornado. Within the space of about 4 hours the fire had spread to over 2,000 acres in some of the most rugged terrain in the Bitterroot. The guess is that it was ignited by a campfire or an errant spark. There were no storms or lightning strikes in the area.

We grabbed gear and headed toward the fire to gain some scope on it’s severity. In many years living in the Bitterroot, we’re accustomed to forest fires. They are a part (terrible, albeit) of life lived in the rugged mountains of Montana. The fire was much worse than we expected. Raging out of control, it quickly spread through canyons as the winds blew it toward Hamilton. Even with several helicopter and aircraft already on scene dumping water and fire retardant, it was clear that they were overpowered by the fire racing through thousands of dead trees that virtually litter the countryside.

Roaring Lion Fire4

In Montana, the US Forestry Service uses a “zero management” program in the local forests. This means that they let Mother Nature take care of herself. Today, once again, we see what happens when you ignore threats to life and limb. While environmentalists will tell you that it’s just “nature’s way”, many would argue that allowing conditions to erode to the point where they endanger local lives and a way of life is just foolish. It’s an argument that local residents have had with US Forestry officials for decades, that seemingly falls on deaf ears.

I’ve personally fought forest fires. I’ve run fire crews in these mountains and I can tell you that when the neglected beetlekill trees ignite, they literally explode setting everything around them on fire. The inferno created by these events causes fire lines to jump like Olympic Athletes from ridgeline to ridgeline in moments. This is particularly frustrating as we realize that those dead trees can be harvested and turned into beautiful cabinetry and flooring which is highly prized by many custom builders throughout this nation. The monies regained in this endeavor could go a long way toward offset responsible land management fees.

After conferring with locals last night, Sheri and I made a bonzai run to Missoula (a large college town to the north) to buy everything we could find to help establish a fallback center for firefighters and first responders. We literally emptied shelves at both Walmarts as we loaded carts with supplies that will allow those retreating from the fire lines (for much needed rest and refueling) the food and showers necessary to help prepare them for their return to the fire lines.

As we drove back down into the Ravalli Valley at almost midnight, we could actually SEE the fire raging almost 50 miles away. Those little spots of red in the photograph below are actually flames almost 100 feet high. It reminded me of those photographs you see of lava flowing down mountains after a volcano erupts. The entire valley glowed eerily from the light of the rapidly spreading fires.

Roaring Lion Nightfall - Valley Entrance View
As we got closer and closer to Hamilton we watched as fire truck after fire truck passed us heading toward the fire in the dark of night toward the glow.  Sadly, we also witnessed tow trucks towing damaged fire vehicles out of the fire zone.

After we dropped off bins loaded with supplies to the First Responder center, we drove up into surrounding hillsides to look up at the fire as we headed back to the safety of our home. I can’t tell you how blessed it actually felt to be safely removed from the fire zone. The forest fire literally looked like it ringed one end of Hamilton as the fire burned toward some of the outlying communities that are home to many of the Bitterroot’s residents.

Roaring Lion - Marcus DalyER

This is the forest fire burning behind Marcus Daly Memorial Hospital. There’s a river separating the hospital from the blaze. Thank Heavens for that.  At least as doctors and nurses care for the injured, they won’t have to worry about being evacuated themselves.

To say that this fire is burning out of control is an understatement. With many, many local firefighters and law enforcement officials standing the line, it’s clear that these brave men and women will personally face danger and destruction as this fire vents it’s wrath on our homes.

UPDATE:

As the sun rises today (Monday, August 1st), many families aren’t as lucky as we once were, as many homes and structures (barns, outbuildings, cabins) have been lost and over 500 homes in the surrounding canyons are evacuated (mandatory) as one of the biggest Type One fires in Ravalli history turns what was pristine forest into a firestorm. Type One teams are quickly arriving and assembling from all over Montana and the region to fight this fire as I type this.

This fire erupted without notice. There was no opportunity for preparation by local residents. Fueled by acres of dead (Beetlekill Pine) trees and 90+ degree heat, it’s like the hillsides simply exploded. Hundreds of animals and livestock are presumed missing or dead as homeowners escorted by Sheriff’s Deputies abandon residences, unable to search for their horses and cattle as the fire races through the canyons.

Returning to the area to seek out lost livestock is impossible. It’s simply too dangerous and cannot be allowed. While it’s a terrible tragedy, the loss of human life is the first (and most important) priority.

This forest fire is currently raging and burning toward Hamilton proper, a town located approximately 5 minutes from the fire’s epicenter.

This morning, some of the downtown areas of Hamilton, MT are covered in a thick layer of ash. As the sun starts to rise today, it simply illuminates the thick red clouds of smoke pouring off the mountains.

It’s going to be a dark day in Montana…

Strong winds have pushed the smoke and ash from the storm all the way to Butte, MT – over 2.5 hours to the east. We’re talking about a distance of 155 miles.  Estimates are that the fire will cover 4,000 acres by midday with thousands more acres of forest standing between it and population centers.

With 40 degree temperature drops aiding the first responders, the firefighters are staging to stand between the fire and Hamilton homes.

Many local families are opening their homes to those families displaced by this firestorm.

Remember that the Bitterroot is a small mountain community. 500 evacuated homes is a huge deal, when you consider the baseline population of this valley. Local restaurants have turned their kitchens into supply lines for firefighters and refugees from the fire. Churches between Missoula and Salmon, ID have opened themselves up to serve as shelters for the families fleeing the fire.

As the day begins to bloom, we can only hope that everyone survives this day. It’s hard to think about tomorrow, when today brings such hardship.

To those first responders, brave firefighters and LEOs… we can only hope and pray for their safety as they face this inferno trying to protect and save the citizens of Ravalli.

To the families fleeing the fires, we can only pray that they are evacuated to safety without loss of life or limb.

It’s going to be a very long day, in a string of very long days to come.

To friends and clients:

As we reach out to assist those assisting others in this terrible time, we ask you to be patient. Our deeds and prayers are with all those impacted by this fire and as we work to aid them, we pray for their safety.

We’d ask that you remember Bitterroot families and the brave men and women that stand the line to protect them in your prayers as well.

Stay tuned.

Happy Independence Day!

3 Jul

Hey Campers!

I wanted to take a moment to wish every single one of you a terrific, safe, memorable 4th of July!

EastFork1
Freedom has its life in the hearts, the actions, the spirit of men and so it must be daily earned and refreshed – else like a flower cut from its life-giving roots, it will wither and die.  ~Dwight D. Eisenhower

We’re spending Independence Day weekend surveying and documenting a rural mountain site for future construction. It’s a small tract of riverfront acreage that just begs for a Corten Cabin and a beautiful barn so that the horses and cattle can run amuck, just as the Big Guy upstairs intended!

EastFork2
The beauty of ISBU housing is that it’s “transportable”. By that, I mean “deliverable” and not “nomadic”. You can build your boxes out as “modules” and then truck them to site to mate with your prepared foundation.

You build your ISBUs out in a fab barn or even on a lot someplace local and easily reachable. Then, you load them onto flatbeds or roll-off trailers for transport to your homesite.

I’m a big proponent of using 20′ High Cube ISBUs for home construction. There’s a reason for this;

They are easily transportable, readily available, easy to place on site using farm equipment, and extremely versatile. It’s like building a home using your child’s Legos!

If you’re using pilings constructed from SonoTubes, it can’t get much easier.

EastFork3
I love the idea of living in liberty, in a home built with my own hands!

Where liberty dwells, there is my country.  ~Benjamin Franklin

For those of you that yearn for our attention… LOL!

Happy 4th of July, Everyone! May your celebration be safe, relatively sane and wonderful!

Happy 4th of July, Everyone!

We’ll be back in the office sometime Wednesday afternoon.

Please, have a glorious time this weekend, enjoying family and friends.

Happy Independence Day!

30 Jun

Greetings Campers!

Now I know that you’re expecting another “Gather round the campfire whilst I tell ya a story about steel and determination”…

But today we’ve put the welders down and picked up another set of tools…

You see… campfires are now officially a no-no!

Let’s just jump in, shall we?

That “Hail and how are ya?'”  camper reference seems perfectly appropriate as we dive into the July 4th weekend!

I say “dive” as I’m hoping that you are all headed to some glorious beach, river or lake to find respite from the heat waves baking the country!

Here at the homestead it’s been 100 degrees plus daily and it’s not just tempers that are flaring.

Mother Nature has decided, in her infinite wisdom, to try to burn off most of the surrounding forests and we’re seeing the wildfires double in size, in less than a day.

Wildfire4

Just south of where I live (by a few miles) a wildfire is raging out of control. The fire line is miles long as it consumes everything in it’s path.

Many readers remember that a few years back I had to evacuate my own home to get clear of the horrific wildfires that threatened our canyon.

Now, many other Montana families are revisiting that adventure…

Property owners who haven’t evacuated their homes have dug in and fire crews from all over Montana and elsewhere have been mobilized to help combat the flaming inferno that is now the Bitterroot Montana forest. I say “flaming inferno” because the surrounding forests are filled with “beetlekill” timber that is almost incendiary when it’s introduced to a spark. “Beetlekill” trees (trees killed by insects) are literally “standing dead” trees just waiting to go off. The trees literally burst into flames like bombs when embers hit them.

Wildfire2

Despite my personal injuries (I’ve torn muscles in my abdomen), I personally spent the wee hours of last night up in the fire zone, surveying the fire’s growth and photographing it as it jumped from canyon to canyon. You could literally see the trees exploding as the fire races from ridgeline to ridgeline.

As I did this, property owners not in their yards clearing out a firebreak or standing the lines in the surrounding mountains… were packing cars and trucks with precious belongings in case they needed to flee the path of destruction that roars toward them.

Why  I telling you all this? I mean, I’m sure you have better things to do than worry about rural Montana, right?

I’m telling you about this  because I want to remind you to BE CAREFUL as you enjoy your July 4th Independence Day extravaganzas!

One stray spark and you can literally turn your party into an inferno!

Wildfire7

Q. What do Montana Firefighters see as they battle flames in the darkness? . A. They see HELL 80 feet tall and raging out of control.

If you’re  camping or playing in the  woods, PLEASE EXERCISE SAFETY!

Please be careful where you point those sparkleys!

Please make sure that the remains of your fireworks displays are  extinguished! Put a bucket of water next to your display area!

Please make sure that campfires are out and doused with water after you’re  through roasting , burgers, hot dogs and marshmallows!

Please exercise safety in every aspect of your celebrating!

The lives you  save… may be your own!

A bed is just a bed unless it’s not!

15 Apr

From the “why didn’t I think of that?” files;

There’s this guy who has decided that the best furniture encompasses every need in one small footprint package. His name is Roberto Gil and he calls it “Urbano”. After looking at his work, we think he’s pretty darned smart.

roberto-gil-casa-collection-urbano-loft-bed-1
His forte of late seems to be “loft beds” where your bed is actually perched on top of your other bedroom  furniture to maximize room space. Now, it should be noted that we build loft beds into containers all the time, but I have to admit that his system makes ours look like something cobbled together in shop class by comparison.

They say that “good things come in small packages”. In this case, they hit that nail square on the head.

roberto-gil-casa-collection-urbano-loft-bed-2
Measuring 119 inches in length and a width of 83 inches, with the furniture system topping out at 107 inches, you can see where I’m going with this. Let’s do some math, shall we? (Not that new “Common Core” crap. I don’t possess enough patience, crayons or even paper to do arithmetic that way!) Let me see, carry the one, divide by hammer-struck thumbs and a few splinters and you get an entire bedroom suite in an approximately 9’11” long x 6’11” wide x 8’11” tall package.

roberto-gil-casa-collection-urbano-loft-bed-3
The Urbano system, based on a King sized bed is the largest furniture unit in Roberto’s “Casa Collection” line. It features interior and exterior closets, dressers with drawers, shelving and a desk underneath its bed. The clearance under the bed platform is tall (almost 6’4″) and that’s enough to enable most people to walk under it without stooping or hitting their heads. The cool part of this system is that you can purchase it with either ONE or TWO staircases depending on your needs. Each staircase has built in storage drawers. To make things light and bright, mirrors and lighting are installed.

As intriguing as this is, it does make me wonder what this format would look like tucked into the bowels of an ISBU bedroom.

Imagine a suite of “sleeping rooms” built from ISBUs that had these units installed. Imagine three containers placed side-by-side, with the outer ones being “sleeping rooms”. Now imagine the center one being a shared “Hollywood” style bathroom.

If you were to build a gable roof with a decent pitch (say 6/12) over these (I’d build that roof on a kneewall of about 3’… and run the single staircase configuration on the inside walls (to take advantage of the gable height) you could do something pretty cool. It would also allow you to utilize the top of that “bath” container in the middle as a shared loft. The best part is that the kneewall floating that SIP (structural insulated panel) roof could also have integrated glazing to allow you both sunlight and ventilation.

You knew I was going to slip SIPs into this conversation, didn’t you? Hands down, SIPs topped with a waterproof membrane and SSMR (Standing Seam Metal Roofing) are my alltime favorite. I’ll mention them every chance I get!

Think about this;

If you used 20′ High Cube ISBU containers to do this you’d have (2) King Sized bedrooms and a large, spacious bath suite tucked into a 20’x24′ footprint. Okay, so you’d be just a little cramped in the headroom department on one side, but by using high cube ISBUs you have a ceiling height of 8’9″. Couple that with a kneewall and this is actually doable.

It the Urbano bed system is just too much for your needs they even have a smaller Arca system that might fill the bill.

roberto-gil-casa-collection-urbano-loft-bed-6

roberto-gil-casa-collection-urbano-loft-bed-7

roberto-gil-casa-collection-urbano-loft-bed-8
Unlike the Arca series of beds, the Urbano beds really do have the whole shooting match installed. They feature interior and exterior closets, dressers with drawers, shelving and a desk underneath the loft bed.

roberto-gil-casa-collection-urbano-loft-bed-4Roberto knew that one color wouldn’t be enough so both the Urbano and Arca beds are available in two color options and prices start from (hold your breath) US$15,000 and $6,000 respectively and you’ll wait about 10-12 weeks for your units to arrive.

Look, I warned you to hold your breath…

You CAN buy these in the United States, but I’m thinking about something else entirely. Wait, I’ll tell you about it after I catch my breath. That price tag had me hyperventilating… LOL!

Okay, I’m back…

What if you went to a big box store like IKEA and purchased prefab cabinets and such and then cobbled this together yourself? Look at the photos. You can SEE how easy it is. Heck, a couple of carpenters could build a similar unit for a lot less than $15,000.00. (Well, unless maybe they’re Union Carpenters!) LOL!

(I know, I know… please send your hate mail to alex@nahnahnanahna.com) 🙂

After passing the photos around here, I’m thinking that we might just have a go at building something similar, based on ready-made “catalog” cabinet kits. No offense to Roberto (because quite frankly his idea is pretty darned good) but we don’t know anyone with enough extra cash laying around to shell out $15 grand for a bedroom set for the kids.

Stay tuned.

PS. ALL of the images for Roberto’s bed systems were collected from Gizmag.com. Why? Well to be honest, I don’t have $21,000.00 to go out and buy copies of these bed systems! That’s actually more than it’d cost me to build the ISBU structure for the three rooms we’re talking about!

(But I have to admit that I wish I did. I think they’re pretty spectacular!)

Corten Canopy – Simple, solid structure…

11 Apr

Dear Ronin,

Unless you live under a rock…

We all know that when it comes to ISBUs and Container Construction, you’re the man.  You’ve become our “Corten Champion” for good reason. We know your dedication to “everyman” and it’s greatly appreciated.

I live on a farm property in Iowa. Outbuilding space is at a premium and I need a place to store hay temporarily. I mean that I need seasonal storage. The hay comes in and then it leaves to market. By early winter, it’s all gone. At this point the cover is no longer necessary.

Lots of people have suggested that I simply purchase and build one of those prefab steel buildings. You know the ones, the ones that look like Quonset huts. I guess they don’t understand what “temporary” means.

I already have a pair of 40′ Containers that house farm tools and provide a place for a secure workshop. They sit about 25′ from each other with dirt in between them.

I can weld and I can follow instructions. I don’t need a crayon drawing, I just need some inspiration.

So, I’m gonna venture  out from my village full of idiots and ask the stupid question;

“If I offset a pair of 40′ ISBUs, how do I cheaply and effectively provide seasonal cover between them that is weather resistant?”

Help Me, Obiwan… all my friends are dopes.

The Hay Jedi

***************

Dear Jedi,

Okay, you piled so much praise on top of that question I can’t really ignore you. I was going to talk about world peace, space exploration and cold fusion, but… oh well. LOL!

First, the praise (while greatly appreciated) is really unwarranted. There are a number of ISBU specialists (okay…. maybe 8…. or 9) out there who recognize that ISBUs combined with “Sustainable Architecture” are the future of this nation. We realize that for this great nation to heal, we have to first have safe, affordable, energy efficient, environmentally responsible places for our families to sleep.

(Oops, that cost us two… 7 left!) LOL!

I suspect that there are those who among us who actually overthink structural solutions because it’s simpler to just “buy” a solution and modify it to serve their purpose. That’s a luxury that  many of us don’t have.

(Yikes… there goes three more ISBU guys! Now we’re down to 4!)

Jedi, your question isn’t really “strange or even odd”. We live (by choice) in rural America. We’re actually lucky enough in life that we got to choose where we’d live and raise our families. It’s a great blessing to us and we wouldn’t trade where we live with anyone on the planet. That said;

We get asked this question all the time and we’ve even been faced with your “storage problem” ourselves. As working ranchers, we build shelter for horses and cattle all the time. As working ranchers we also grow hay. We bale in large and small squares and that hay either gets trucked or railed to the buyers. While it’s sitting, we want it protected from the elements.

Now you can either simply tarp it (like we do our round bales), or…

You can build a canopy out of galvanized pipe and tarps that runs between a pair of ISBUs to form a “tent” of sorts. Once you’ve seen the photos of the finished product, you wonder why you didn’t think of it yourself. At least we did.

Image Credit: HisCoShelters.com

Image Credit: HisCoShelters.com

You can see how simple it is.

What you want is something that is easily erected  and taken down (in a few days by a few guys), something that breaks down for easy storage (perhaps stored in the cavity of one of the ISBUs that supported it in the first place) and something that is durable and easily repaired if necessary. The reasons for the canopy are obvious. It has to provide protection from the sun, rain, wind and snow.

(We actually cheat and use the stacked hay as the “scaffolding” required to erect the canopy cover. It beats hanging off the end of a cherry picker or a forklift.)

The canopy has to be “idiot proof”. The reason for this is simple. At some point, your idiot brother-in-law is going to have to help you erect it and you want to insure his survival through the project.

(Oh stop it! I’m just saying what you’re thinking. Admit it. You love the big dork, you just feel like thrashing him or pushing him off a roof every once in a while! Huh? Okay, well maybe it’s just me.)

Where was I? Oh yeah…

Your “canopy frame” is going to be constructed out of galvanized pipe that you can find at any big box store (like Home Depot or Lowes).

Remember that it’s not necessarily the OD (outside diameter) of the pipe that implies strength. It’s the WALL THICKNESS of the pipe (the pipe material thickness) that determines how strong that pipe will be when used as structure. You want that pipe wall to be as thick as possible. You’re using it to create rafters that will interconnect to form a big tent frame. We use 11 gauge pipe for the risers and at least 13 gauge pipe for the rafters.  Yes, it will be more expensive to construct. But built of high quality components, it will perform well and last for decades.

The connector fittings that you’ll require to construct your galvanized pipe frame will come from the same place. We’re not going to use anything exotic or “special order”. Using “off-the-shelf” parts insures success and easy replacement if you need extras.  You’ll need the typical L fittings, T fittings, 3 ways and 4 way fittings.

The only thing that you’ll want to “special order” will be the twistlocks that we’re going to use to take advantage of the mounting points already engineered into your containers.

What?

Yes. You said you could weld. We’re going to make you prove it. We’re going to affix the canopy to the shipping containers using the twistlock cavities built into them. The reason for this are twofold;

(a) You have a perfectly good mounting point already sitting there waiting for you, and

(b) There are some people out there that actually drill mounting holes into the container to affix the canopy to. We think this counter-productive as you’re then perforating a previously weather resistant structure.

What WE did was to use a pair of fabricated 40′ steel channels (you could even use angle iron) to create a bottom plate for our “tent runs”. (We used scrap steel so the only fabrication we required is to weld similar segments together to establish your “run”.) We modified and then welded twistlocks to the bottom of the channel at the appropriate mounting points for our containers to affix the frames firmly to the top of the container.

And yes, before you ask, we DID flash the connection point between the rails and the containers to further weatherize the structure.

This gives your canopy a “resting place” to nestle into. Here’s where I’m going with this;

We’re going to build a freestanding, weather-resistant canopy assembly that fits down into that created and secured rail on either side, using bolts (drilled through the canopy frame base) to secure it into the new shipping container channels.

We based the entire frame on 1 7/8″ OD  galvanized pipe. Over trial and error, we’ve found that this pipe dimension is cost effective, works the best and proves itself to be the most durable over time. All of your connecting fittings will be sized to allow use of this pipe.

And once you build your frame, you have to cover it with something, right. Well, by now, you know us and the way we think. We reuse, repurpose and recycle everything that we possibly can. While there are those who applaud us for our “green environmental” status, I assure you that it’s just good design, common sense and reflective of the fact that we aren’t made out of money. We don’t know anyone else who is, either.

We used old billboard tarps that we got from a local advertising agency for scrap costs. They’re durable, cheap and easy to source. Overlapping them makes covering a large frame pretty simple. Using billboard tarps also makes canopy replacements easier if Mother Nature spanks you…

We’ve found that by using a multi-panel solution, you’re only replacing a damaged panel and not the entire top. You can replace a panel quickly and then repair the old damaged one when time allows.

FYI: Turn the tarps over so that the white surface faces up. That while surface will reflect sunlight and your hay (or your livestock) won’t care if Subway is having a “supersale” on Spicy Italian sandwiches. It might make YOU hungry, so we suggest that you simply refrain from staring up at that delicious, mountain sized sandwich if at all possible.

(I wonder if that qualifies as an endorsement of Subway Sandwiches? Maybe they’ll send me a fistful of coupons? LOL!)  

Maybe you don’t LIKE Subway. Well, that’s just unAmerican and around here we have names for people like you, but… if you  wanted to go “high tech” with your canopy cover you could use large multiple layer (4 layer) poly covers (12 mil at least) that were fabricated from Ripstop with UV treating and grommets every 12″ on the borders to allow for secure fastening to your canopy frame.

It seems like a lot of grommets but you’re going to want as many tie-down locations as possible. A cover like this will last for about 5 years at least – barring Mother Nature trying to bite you on your behind. There are other tarp materials that give longer lifespans and they’re priced accordingly.

Okay, you get the jist of what we’re building. You’re going to build a freestanding cage out of that pipe to span your two existing containers. It will set on top of the “inner” top rails of the boxes in that new channel and provide you with one long continuous covered bay to put your hay, horses, disobedient children or unwanted relatives into.

I’m not telling you how to raise your kids or your relatives, but I can tell you that making good on the “Subway Solitary Confinement Module” threat at least once will get those dishes and the yardwork done a lot more often without an argument. Just saying…

I’m also not going to get into dimensions because I don’t know how much hay you’re actually storing, but I can tell you that you can get a pretty significant peak height (over 7/12 PITCH) if you think out your solution.

When we determined that we needed more “height”, we simply added containers on top of the pair we’d started with.

(I know, I know… it’s easy to do that when you’re the self-proclaimed “King of Containers”. But hey, it worked. And now my kids have a playhouse that even the elk and deer can’t get into!)

Plan on running rafters consisting of a “galvanized pipe rafter assembly” every 4′ on center. With additional pipe stringers placed between the segments (at least 2 per side) you can build a sturdy, long-lasting pipe canopy cage that will last for years and years. The closer those rafters are, the stronger your canopy will be. We like 4’OC. You can like anything you want. It’s a free country… for now. LOL!

One of the things that we did (that isn’t depicted in these photos) is that we added those “stringers” into the runs between the tent rafter assemblies to add more support to the canopy in case of a freak snowstorm or heavy rain.  When observed without the canopy the framing looked like a gigantic “skeletal” roll cage. I told my kid that it was the start of my new “Transformer” barn. By the rolling of his eyes I could tell that he didn’t believe me.  However, he DOES understand that if he doesn’t do his chores… LOL!

Image Credit: HisCoShelters.com

Image Credit: HisCoShelters.com

There are those who do NOT add stringers in between the  rafters. The claim is that the snowload tends to create sagging of the tarp cover at the stringer points. Okay, that’s reasonable… but we prefer the inherent strength of the galvanized pipe tent cage assembly as described to the replacement of a damaged tarp panel. YMMV. Again, free country… so far. LOL!

The tarp is secured to the frame using ball bungees passed through the grommets and you’re  going to need a lot of them. Figure on at least 150 (and I’d order more of them so I had plenty of spares over the life of the canopy). Note that if you’re  using billboard tarps, you’re gonna be punching a lot of holes in the borders of those tarps and applying grommets.

I’ve found that this task is best accomplished by kids who don’t want to be grounded for the entire summer. Okay, it’s tough love, but I do need a tough tarp. I’m just hoping that the kids therapy bills don’t eat up the savings this build gained me in my annual ranching budget. 

This canopy is a pretty easy solution and one that can literally be constructed by a family in their yard or service bay area. We’ve done these as “family projects” and even as “vo-tech colunteer projects”.

Before I close this I want you to know that there are sites where you can buy these canopy solutions, pre-packaged. If you’re not feeling particularly handy, you might google them.

A cursory search revealed HisCoShelters.com and I spoke with the company owner, Larry this AM. His canopy solution is efficient, pretty durable and cost effective. If you contact Larry’s company with your dimensions he’ll ship you the tarp cover (which comes in several thicknesses depending on your goals and objectives) and a big box full of the fittings you’ll use to build your frame. While his fitting are proprietary and designed specifically for this purpose, the provided drawing will give you all the galvanized pipe lengths (which you’ll source at your local hardware supplier).

Then it’s as simple as following the diagrams to erect your canopy.

He also has a downloadable book on his website that further defines the canopy building process and the products he provides. I highly recommend that you download this book and then use the information in it to help you design your solution.

Here’s his contact information;

HisCoShelters.com
larry@hisconw.com
360-217-7186

It should also be noted that I have no affiliation with Larry or HisCoShelters.com and I receive no compensation for his participation/inclusion in this post.

So campers, there you have it. If you need a canopy to store hay or feed, a shelter for horses or livestock, a carport for your truck or tractor… this might just be the solution you’re looking for.

Until next time…